Posts

My friend deserves this and more

Image
Hello! I'm up on the DCWV Blog today showing this cute gift bag I made for a friend who definitely deserves the time and extra effort. We've been friends for 13 years! gasp! I made this with one sheet from the DCWV Brights 11x17 stack. You can find these super size stacks at Joann stores.  I love them because they're double sided and the patterns and solids coordinate so beautifully. Here's how I creased the paper:  I used my scoring tool and ruler to make the creases. I folded along the lines and I folded the top and bottom one inch down so the solid color would show against the pattern.  Next, I cut the middle tabs as shown, then turned it over: To decorate the front more, I placed a strip of DCWV gold  glitter paper under the fold, About half an inch of gold is showing. I made sure to crease the gold paper first where it will need to fold.  Now you can fold your bag up. Make sure the middle tabs are inside...

Hello Sweetie!

Image
Hello! I can't believe it's already September!  that means my baby turns 1 this month. oh my God where did the time go? so I'm using the pink foil stationery and the silver and white box of cards to create birthday invites. I use the front of the silver foil stationery but had to back it up onto silver and white card because the stamp I wanted to use on the inside was longer than the pink foil card. I cut the greeting out of black DCWV cardstock using my scan N cut. then I ran it through the Xyron sticker maker. I cut the one out of DCWV shimmer cardstock and backed it with DCWV silver glitter paper. Hope I've inspired you to play with your crafty supplies today!

Super Sized Home Decor

Image
Hello everyone! Today, I have a super sized project for you I saw something similar for sale and I thought, 'I can make that!' It's big, 24x36 in! The dog is there so you can get an idea of the size. He was a better model than the baby because he stayed still longer :) I really do Love California. I feel like we have the best of everything minus the earthquakes. I wouldn't miss that. This would be an easy project to make if you want to display your love for your state.  I hand traced the shape of California on 2 pieces of the 16x20 paper and adhered it on to the burlap background using  Tombow Power Tabs (only took 5!). Then I sketched the 'LOVE' letters and heart using a ruler because I didn't feel like using a machine. I used the map paper project roll for the letters. The way the heart came out is my favorite part. I adhered the letters using a tombow foam tape roll. I hope this inspires you to get crafty with the n...

August Stack-a-holic sketch reminder

Image
Head on over to DCWV's new blog and check out this month's sketch . You still have time to enter! This is What I made as inspiration: DCWV Happy Days stack (Joann's) DCWV Ocean Breeze stack and Premium Burlap (Joann's) Now, GO! Make something, get crafty! Have a great day!

Mix N Match N Adhere

Image
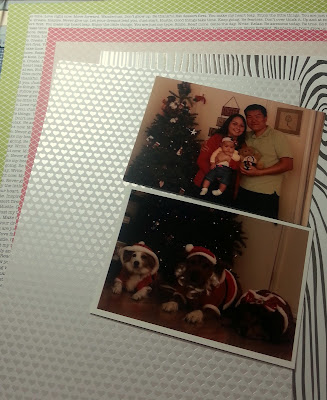
I love to Mix N Match DCWV stacks. Although, they are perfectly coordinated, it's like a little challenge for me! Here, I mixed 3 different stacks: Hello Darlin', Silver Lining and DIY Wedding (You can find these at Joann stores). None of these stacks have anything to do with Christmas, but I'm using Christmas photos. Hmm...I do like a challenge! Here are the papers I pulled out.  I committed myself to using these and not going back in to the stacks to change my mind or I would be working on this LO FOREVER! I chose my background, matted the photos and started layering the papers. I fussy cut the typewriter out of the Hello Darlin' stack. This was my basic layout. Then, I pulled out a few packs of Freckled Fawn Christmas embellishments and started placing them. I didn't go back into my supplies for this step either and committed to using what I had pulled out.  I really like the end result and it was quick work!  The journaling is hidden behind the photos. ...

A FANtastic Layout

Image
Hello! It's been a while, huh?!  I’ve been having so much fun with the new stacks out at Joann Stores. This time, I’ve mixed the Jet Black and Marquee stacks. The Jet Black stack surprised me! I colored it with colored pencils and then experimented with watercolors. I liked the watercolors so much, I decided to use it as a background.  Gosh, I’ve been bombarding you all with Doctor Who themed stuff, but um…here’s another one! I incorporated the watercolors into the layout by choosing embellishments in yellow and just a few splashes of pink watercolor.  By 6 months, baby clapped and looked at the TV when she heard the Doctor Who theme song.Got her started early! lol  The Marquee stack has the perfect shade of TARDIS blue mixed with some pretty purples, creams, whites and blues. And the Jet Black stack? You can use that with anything! Color me impressed!!! Have a FANTASTIC day!

My hubby's anniversary card is out of this world!

Image
We recently celebrated our 12 wedding anniversary!  Due to our current love of all things Doctor Who, I presented my husband with this card: The background is  a DCWV 5x7 card. I used folk art paint in sterling, blue and glitter to create the space time vortex. Then, I cut the TARDIS from DCWV cardstock with the brother scan n cut and attached it to the card base. I just knew DCWV would have the perfect TARDIS blue! I was struggling to finish it all day because someone kept me busy. I let her play with the scrapbooking supplies on the lower shelves to keep her busy....and I'm secretly hoping the love of crafty things will stick.  My washi tapes are definitely her favorite 'toy.'  What fun stuff have you been up to?